Table of Contents
Enhancing Multimedia Content:
Watch Story for a Quick Understanding:
In the dynamic world of web development, integrating multimedia elements such as audio and video is essential for creating engaging and interactive web pages. In this comprehensive guide, we will explore the usage of audio and video elements in HTML, providing you with the knowledge and skills to embed audio and video content seamlessly. We will delve into the <audio> and <video> tags, understand the attributes associated with them, and practice embedding multimedia content into your web pages. Through code examples and best practices, you will learn how to enhance your web content with captivating audio and video elements.
Embedding Audio Files Using the audio Tag:
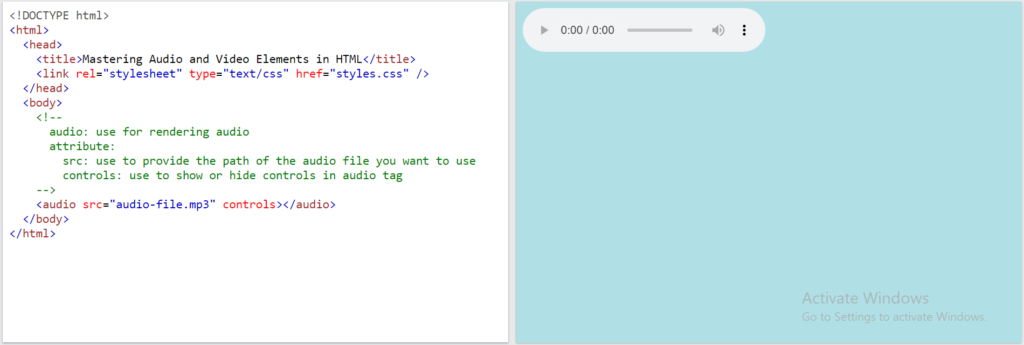
The <audio> tag is used to embed audio files into HTML documents. It allows you to control various aspects of audio playback, such as source, controls, autoplay, and more. Let’s consider an example:
<!DOCTYPE html>
<html>
  <head>
    <title>Mastering Audio and Video Elements in HTML</title>
    <link rel="stylesheet" type="text/css" href="styles.css" />
  </head>
  <body>
    <!--
      audio: use for rendering audio
      attribute:
        src: use to provide the path of the audio file you want to use
        controls: use to show or hide controls in audio tag
    -->
    <audio src="audio-file.mp3" controls></audio>
  </body>
</html>

In this code snippet, we have used the <audio> tag to embed an audio file named “audio-file.mp3” into the HTML document. The src attribute specifies the source of the audio file, and the controls attribute adds audio controls to the player, allowing users to play, pause, and adjust the volume of the audio.
Embedding Video Files Using the video Tag:
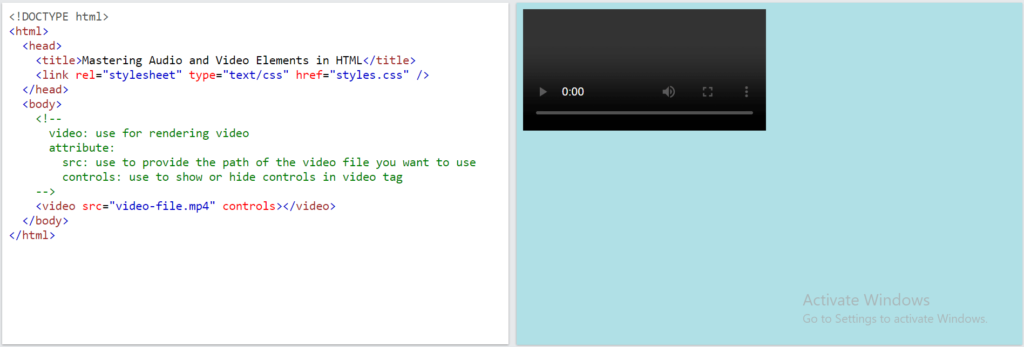
The <video> tag is used to embed video files into HTML documents. It provides similar functionality to the <audio> tag but specifically for video content. Let’s see an example:
<!DOCTYPE html>
<html>
  <head>
    <title>Mastering Audio and Video Elements in HTML</title>
    <link rel="stylesheet" type="text/css" href="styles.css" />
  </head>
  <body>
    <!--
      video: use for rendering video
      attribute:
        src: use to provide the path of the video file you want to use
        controls: use to show or hide controls in video tag
    -->
    <video src="video-file.mp4" controls></video>
  </body>
</html>

In this code snippet, we have used the <video> tag to embed a video file named “video-file.mp4” into the HTML document. The src attribute specifies the source of the video file, and the controls attribute adds video controls to the player, allowing users to play, pause, and adjust the volume of the video.
Understanding Additional Attributes:
Both the <audio> and <video> tags offer a wide range of attributes to customize the behavior and appearance of the multimedia elements. Some commonly used attributes include:
autoplay: Automatically starts playing the audio or video when the page loads.loop: Enables continuous playback of the audio or video.preload: Specifies whether the audio or video should be loaded when the page loads.poster: Displays an image as the placeholder for the video before it is played.
Practice Embedding Audio and Video Content:
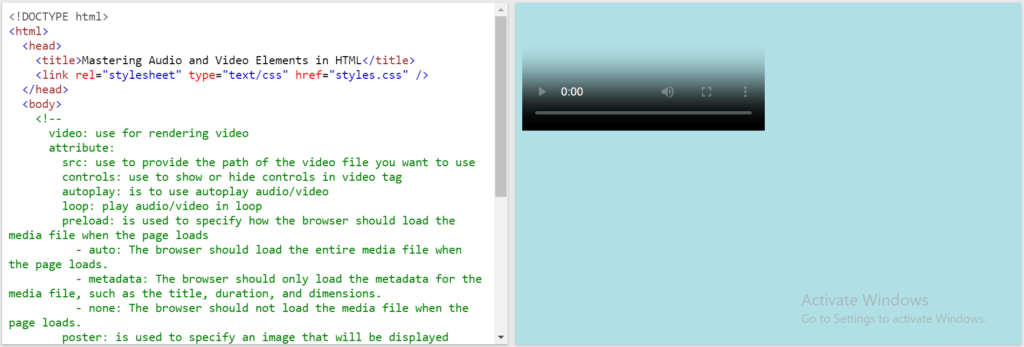
To further solidify your understanding, let’s explore a more comprehensive example that incorporates various attributes:
<!DOCTYPE html>
<html>
  <head>
    <title>Mastering Audio and Video Elements in HTML</title>
    <link rel="stylesheet" type="text/css" href="styles.css" />
  </head>
  <body>
    <!--
      video: use for rendering video
      attribute:
        src: use to provide the path of the video file you want to use
        controls: use to show or hide controls in video tag
        autoplay: is to use autoplay audio/video
        loop: play audio/video in loop
        preload: is used to specify how the browser should load the media file when the page loads
          - auto: The browser should load the entire media file when the page loads.
          - metadata: The browser should only load the metadata for the media file, such as the title, duration, and dimensions.
          - none: The browser should not load the media file when the page loads.
        poster: is used to specify an image that will be displayed before the video starts playing
    -->
    <video
      src="video-file.mp4"
      controls
      autoplay
      loop
      preload="auto"
      poster="poster-image.jpg"
    >
      <source src="video-file.webm" type="video/webm" />
      <source src="video-file.ogg" type="video/ogg" />
      Your browser does not support the video tag.
    </video>
  </body>
</html>

In this example, we have embedded a video file using the <video> tag. The src attribute specifies the source of the video file, while the controls, autoplay, loop, preload, and poster attributes provide additional functionality and customization. Additionally, the <source> tag is used to specify alternative video formats to ensure compatibility with different browsers.
Best Practices for Embedding Audio and Video:
Choose appropriate file formats:
Use widely supported file formats such as MP3 and MP4 for audio and video files, respectively, to ensure compatibility across different devices and browsers.
Optimize media files:
Compress audio and video files without compromising quality to reduce load times and improve overall page performance.
Provide alternative formats:
Use the <source> tag to specify multiple video or audio formats to accommodate different browser capabilities.
Consider accessibility:
Include text alternatives or captions for audio and video content to make them accessible to users with disabilities.
Test across different devices and browsers:
Ensure that your audio and video content works seamlessly across various devices, browsers, and operating systems.
Conclusion:
In conclusion, embedding audio and video elements using the <audio> and <video> tags in HTML allows you to enhance your web pages with engaging multimedia content. By understanding the attributes associated with these elements and following best practices, you can create immersive audio and video experiences that captivate your audience. Embrace the power of audio and video in your web development journey and elevate your web content to new heights.
This Journey will be continue…
Github Branch: Mastering Audio and Video Elements in HTML
Github Repo: HTML


